本文将介绍 Freescale 提供的工具软件 iMX USB loader 以及 UTP 的使用方法。
在使用 iMX6Q SabreSD 开发板时,如果我们对 Linux 内核或者根文件系统进行了定制则需要将新的软件部署到开发板。将软件部署到开发板的方法与开发板的启动方式有关,如果我们需要开发板从 eMMC 启动则需要将软件部署到 eMMC 存储器,使用 Freescale 提供的 iMX USB loader 和 UTP 2个工具能帮助我们完成这项工作。
软件环境
- 操作系统: Ubuntu14.04
开发板设置
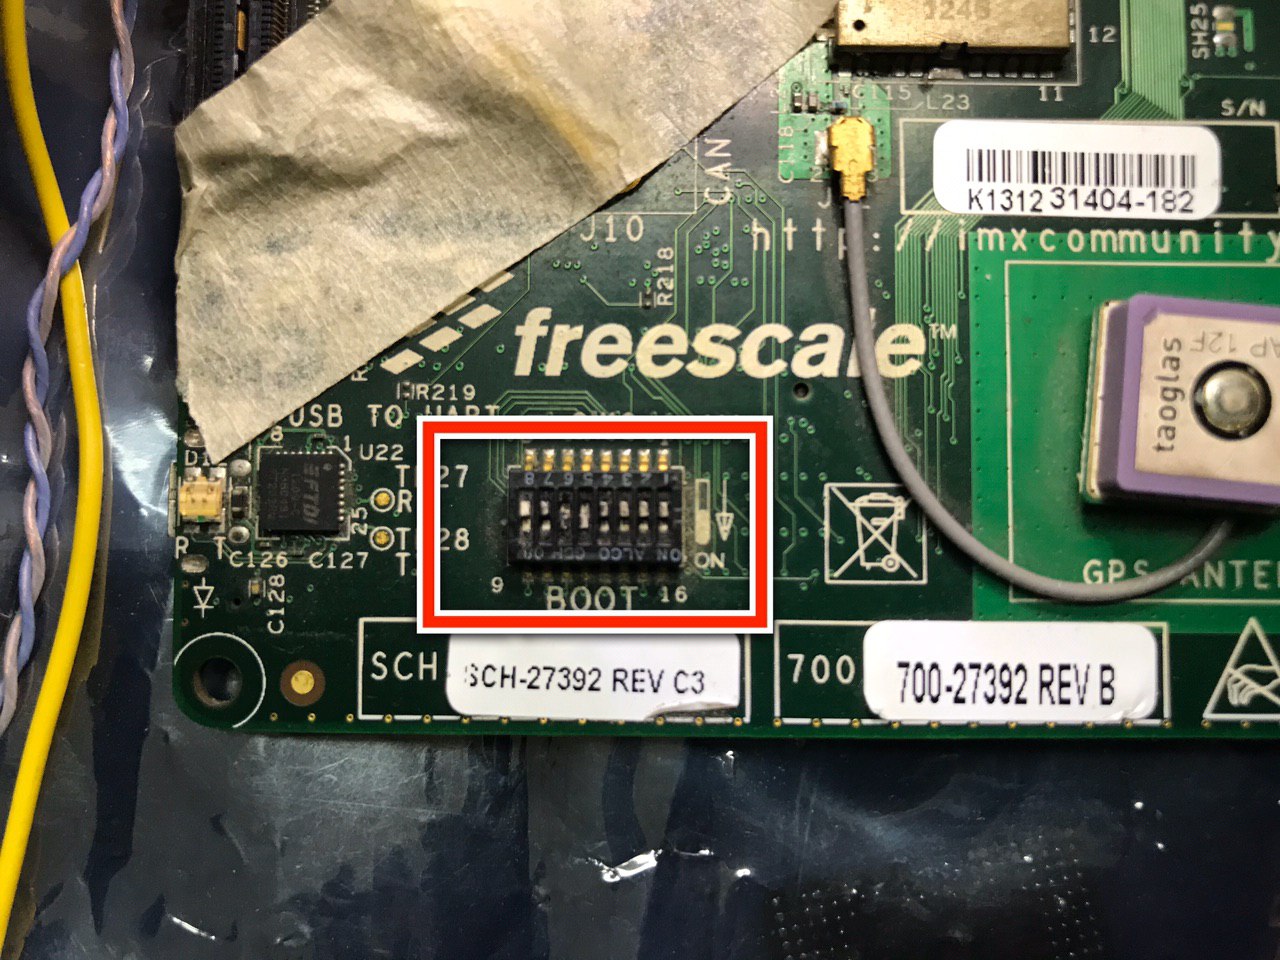
在操作之前需要将开发板设置到下载模式,iMX6Q SabreSD 的说明文档中提到:
Mode Switch download mode(MFGTool mode) (SW6) 00001100 (from 1-8 bit) eMMC (MMC3) boot (SW6) 11100110 (from 1-8 bit) MMC4 (SD2) boot (SW6) 10000010 (from 1-8 bit) MMC2 (SD3) boot (SW6) 01000010 (from 1-8 bit) Freescale – Android User Guide
所以我们将开发板的启动拨码开关拨到如下位置:

将开发板的 USB 接到电脑端,使用 lsusb 命令可看到如下信息:
1 | lsusb |
可看到电脑端成功识别了开发板,记录下 ID 信息:
- ID: 15a2:0054
在开始后面步骤之前请将开发板串口与电脑端连接,方便通过串口查看调试信息。
iMX USB loader 安装配置
- 安装
libusb。
1 | sudo apt-get install libusb-1.0-0-dev |
- 获取 iMX USB loader 源代码。
1 | git clone https://github.com/boundarydevices/imx_usb_loader.git |
- 编译
1 | cd imx_usb_loader |
- 修改配置文件
查看文件 imx_usb.conf 根据刚刚记录下来的 ID 值找到取对应的开发板配置文件:
1 | ...... |
将文件 mx6_usb_work.conf 的内容修改为如下:
1 | mx6_qsb |
- 使用 USB loader
创建 firmware 目录:
1 | mkdir firmware |
将生成的镜像文件拷贝到 firmware 目录中后执行:
1 | ./imx_usb |
等待半分钟左右,可通过串口看到输出的启动信息:
1 | ...... |
此时开发板通过 USB 将自己模拟成一个 sg 设备,在电脑端可以通过以下命令查看此设备:
1 | ls /dev/sg* |
其中 /dev/sg1 就是开发板。通过此设备我们便可用 UTP 工具与开发板通信。
UTP 安装配置
- 安装
libsgutils2。
1 | sudo apt-get install libsgutils2-dev |
- 获取 UTP 源代码。
1 | git clone https://github.com/ixonos/utp_com.git |
- 编译
1 | cd utp_com |
- 使用 utp_com 与开发板通信
1 | ./utp_com -d /dev/sg1 -c "$ echo hello, world!" |
通过串口可看到开发板的输出信息:
1 | UTP: received command '$ echo hello, world!' |
总结
至此我们完成了 imx_usb 和 utp_com 的安装配置,使用 imx_usb 向开发板下载固件,以及使用 utp_com 与开发板通信向其发送并执行指令。具体工作如下:
- 开发板下载模式配置
- iMX USB loader 安装配置
- UTP com 安装配置